I know it's fall now but I like so many other Torontonian's I refuse to let go of the Summer until the very last moment. Heck, even in the Winter I still think it's BBQ Season, looking for a few hints on how to make the perfect grilled anything? Well, you have found a pretty great place to learn how. Over the next few post I'll be going over some basics to help you through some BBQ basics to keep all year round!
Today, we will begin with grilled vegetables. Simple, easy and quick.
Adding grilled vegetables to your repertoire on the BBQ is simple and a great way to add variety to your diet. Salads are lovely and should be part of any BBQ but I think that grilled vegetables are a great addition not to be overlooked.
When you are planning to head out to your local grocer or farmer's market keep grilled veg in mind. I would suggest the following on the grill anytime: asparagus, eggplant, mushrooms, peppers and a many more. Once you have them back at home and are ready to cook. Treat them like you would any great piece of meat. Marinating them will boost their flavour, make it easier for you to cook and will make any dinner guest or family member drool with anticipation.
Simple Marinade for Grilled Veg
Olive Oil
Minced Garlic
Thyme - Fresh or Dried
Balsamic Vinegar
Worcester Sauce
Cracked Black Pepper
Kosher Salt
Hints
Eggplant and Mushrooms are like sponges they absorb olive oils and other flavouring very readily. Make sure to use enough so that they cook easily.
Use Zip-Lock Bags for marinating purposes.
Cut the vegetables in to pieces that will help in aiding you to cook them uniformly.
Do not mix vegetables with meat in the same marinade - this could lead to food borne illness.
ENJOY!
chef, photographer, blogger, i love to cook, i love to eat, i love to blog
Showing posts with label hints. Show all posts
Tuesday, 2 October 2012
GRILLED VEGETABLES - HERE'S A PRIMER
Labels:
BBQ,
Good Eats,
hints,
local foods,
recipes
Monday, 5 September 2011
What would my last meal be on Earth? Quite possibly this...A Roast Chicken
Whenever, I have ever been asked as a Chef, if I could choose anything at all, what would my last meal on earth be? Invariably, the answer is usually between a really simple yet perfect bowl of pasta like the one that I recently discovered at Briscola restaurant in Toronto or the King of all comfort food…roast chicken. To be honest, I believe that nothing congers up visions of homey, rustic, delicious food than a simply cooked roast chicken.
Now I am certain that there are as many different preparations of roast chicken as there are days in the week. But for this post, I have decided to break down a few chickens into its component pieces, to expedite the cooking time and to make it applicable to home cooking even on weekdays where time or the lack thereof is always a concern. I hope that you enjoy this simple, delicious and quick recipe of one of my favourite foods.
Ingredients
1 Whole free-range chicken (chicken legs, drums or breast can also be used)
1 Large Onion
1 Celery stalk
1 Carrot
1 Bunch of Fresh Thyme
1 Bunch of Rosemary
3 Bay leaves
Kosher Salt
Cracker Black Pepper
Fresh flat leaf parsley
3 Garlic cloves
½ Lemon
Olive oil
Method
Preheat oven to 450° F
If using a whole chicken, breakdown it down into pieces OR can use store bought pieces – whichever is easiest.
Place in a large mixing bowl.
Wash hands and sanitize.
Season with whatever you would like – keep it simple.
I used seasoning salt, pepper, paprika and soya sauce to marinate the chicken pieces.
Place in fridge until ready to cook.
Get a baking sheet and line it with parchment paper.
Wash, peel and cut into a small dice the carrot, celery and onion. This is the holy trinity of roasting, braising and stocks and so much more. This is called a mirepoix. Place the mirepoix on the tray, a drizzle of olive oil, add thyme, bay leaf and garlic cloves.
Get the chicken out of the fridge and place in a even layer to promote even and thorough cooking.
If your oven is convection turn on the fan and place tray in the oven.
Once chicken is in oven, reduce heat to 400°F and let roast for 25 mines.
After cooking for 25mins, flip the chicken pieces to allow for even browning and crispy skin. Allow to cook for approximately another 15mins or until the chicken is done.
Chicken is done when an instant read thermometer reads an internal temperature of 180°C.
Take the chicken out and let sit for a few moments.
When you are ready to serve the chicken squeeze the lemon over the chicken.
Enjoy!
For any suggestions on flavour combinations or advice on how to butcher a chicken please comment or connect with me on @Twitter! Take care and enjoy the recipe!
Labels:
blog,
Classes,
food and wine,
Good Eats,
Herbs,
hints,
photography,
recipes,
Rustic,
techniques
Roasted Beets, Carrots, Peppers with my Garden Herbs..so simple so delish!
Lately, I’ve been obsessed with beets. When I was a child, my parents would make beet soup with pork. It was rustic, homey and delicious.
Beets are nutritious and packed with flavour. Like carrots, beets have natural sugars that are released when roasted, which makes them so sweet.
I was at a local market the other day and saw these beautiful deep purple beets and thought to myself, “what can I do with these?” This is a simple, quick recipe that I created consisting of roasted beets with carrots, red peppers, onions and fresh herbs are so easy to make and hard to resist!![]() |
| Lovely locally sourced beets, carrots, red peppers - treated simply, when cooked the natural sugars caramelize and make them hard to resist! |
Ingredients
3 Beets
3 Carrots
3 Red Peppers
1 Bunch of Thyme
1 Large Onion
3 Cloves of Garlic
Olive Oil
Kosher salt
Cracked Black Pepper
Method
Preheat oven to 400° F
Prepare the baking sheet by lining it with parchment paper.
Peel and slice the onion.
Wash, peel the Beets, Carrots and Peppers.
Cut them into wedges keeping in mind the differing time required to cook the ingredients evenly. Carrots and beets take longer than peppers to cook.
Crush the cloves of garlic.
Combine in a large mixing bowl with the thyme.
Drizzle the olive oil and mix thoroughly.
Season with salt and pepper.
Lay out the mixture on the baking sheet evenly and place in the oven to cook.
Roast in oven for approximately 35 mins or until the beets and carrots are fork tender.
Enjoy!
Labels:
blog,
Classes,
Fresh Vegetables,
Herbs,
hints,
photography,
recipes,
Rustic,
techniques
Tuesday, 5 July 2011
One Pot Wonders Equal Comfort Food for the Soul
Kale, Cabbage, Beer and Smoked Sausage One Pot Meal
Ingredients
Olive Oil
Bay Leaf
Garlic Cloves (3)
Bunch of fresh Kale (wash and de-rib)
Green Cabbage 1/2 (wash and cut into uniform chunks - about an inch wide)
Bottle of your favourite Beer, Stout, Bitter or Lager
Chicken Stock (1 cup)
Heavy Cream (1/2 cup)
Smoked Pork Sausage
Dijon Mustard (1 tbsp)
Kosher Salt
Black Pepper
Heavy pot – preferably Le Creuset for even heat distribution and supreme cooking
Dijon Mustard
Instructions
Wash and de-rib the kale, drain
Wash and cut the cabbage in to uniform chunks about an inch wide, drain
Place Le Creuset on the range on high heat
Once things get going things are going to get done in pretty quick order…get ready!
Add olive oil, bay leaf and garlic cloves to the pot. Note do not burn the garlic
Add Kale – stir, let it sweat for a few minutes, kale takes quite a while to soften. Make note to ensure that Kale does not burn!
Reduce heat to Med-High on a gas range – if you have electric…manage your heat so that the bottom does not burn!
Add Cabbage – stir, let it sweat as well for a few minutes, like Kale cabbage is a harder vegetable, takes longer to soften but is ideal for stews and casseroles
Now time for the beer – this adds flavour, steam, complexity to the end result. The alcohol will cook out. Reduce. To reduce means that the water evaporates from the liquid you added, intensifying the flavour. Make sure that it boils.
Add chicken stock. Reduce as well. IF you don’t have chicken stock…lord knows why not…just add a dry white wine. Make sure that if you wouldn’t drink it…why would you cook with it?
Add heavy cream. Reduce and simmer.
Now for the Smoked Sausage. Place on top. Cover the Le Creuset.
Leave it alone now on a Med-Low Heat and let the sausage cook up and the juices flow over the vegetable mixture. Stirring occasionally.
Add Dijon Mustard at the end just before you are going to serve. Just a tablespoon or so…it is to taste.
Seasoning is important! I always season as I go and so should you.
Enjoy!
Recipe created by baguettes and butterscotch and heavy influences from mentor and friend Master Chef Robert Orsi
Labels:
blog,
food and wine,
Fresh Vegetables,
Good Eats,
hints,
influences,
master chef,
One Pot Cooking,
recipes,
reqional cuisine,
roots,
techniques,
tips
Thursday, 23 June 2011
The Pork Belly Experiment - Confit of Pork Belly
![]() |
| Beautiful pork belly from our local butcher, note that the top skin is still on but it has been de-boned. |
![]() |
| I carefully remove the top-skin and set it aside, do not discard. |
![]() |
| All the ingredients prepared to cure the pork belly. Star Anise, Juniper berry, Bay leaf, Kosher salt, Brown sugar & wine. |
![]() |
| Lovely cinnamon sticks. |
![]() |
| Detail shot of the curing mixture on the pork belly in preparation to store in the fridge for two days. |
![]() |
| Another shot of the mixture on top of the pork belly in preparation to store in the fridge. |
![]() |
| I love pork belly! |
![]() |
| Place in the deepest, coldest part of your fridge. Use the top-skin as a blanket to prevent from drying out too soon. |
![]() |
| Note how compact the pork belly has become, the colour has also intensified. The pork has become more dense. |
![]() |
| Pork belly in the pot covered in olive oil in preparation to be poached for 5 hours. |
![]() |
| Detail shot of the pork belly cut into pieces to fit the pot. Note that the top-skin is lining the bottom of the pot. |
![]() |
| Make sure that you use enough olive oil to cover the pork. |
![]() |
| Once ready bring the pork belly up to a simmer. Do not cook covered, do not rush this process. |
![]() |
| Just a shot of the pork belly on my range. |
![]() |
| Just a detail shot of the pork as it cooks. Once the colour changes and deepens you are getting close to being done. |
![]() |
| Beautifully cooked and cooled pork belly. Store in air tight container. |
Labels:
hints,
recipes,
reqional cuisine,
techniques,
tips
Friday, 10 June 2011
Delectable Reading - Plate to Pixel by Hélène Dujardin!
Plate to Pixel Promo Video HD from Taylor Mathis on Vimeo.
Available for order through your favourite online bookstores. It is a must for those who are interested in learning how to make your photos look delicious and for those who simply enjoy beautiful photography!
Labels:
books,
hints,
influences,
photography,
reviews,
techniques
Tuesday, 17 May 2011
How can I help you? Grilling explained....
How to get perfect grill marks on the BBQ? Simply & easily…all the time!
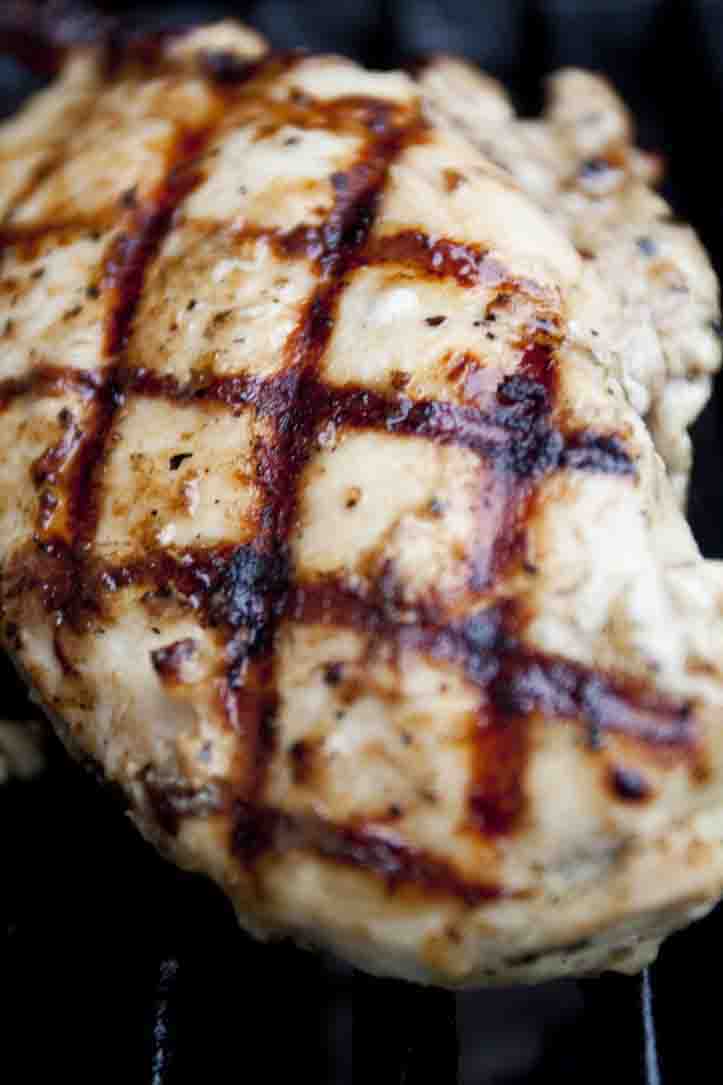
Answer, it is as simple as 10 o’clock and 2 o’clock. Just like your driving instructor told you while you were first learning to drive. I’d like to give you a few hints on how to impress yourself and your friends with your BBQ prowess.
First, the most important thing about getting great grill marks on any kind of meat, fish or vegetable is to make sure that you pre-heat grill!
Scrape and brush clean your BBQ grill. Once its nice and hot get what you are cooking ready!
Lightly oil your grill and get ready to cook!
After you have decided what you are going to cook first. Chicken before beef..you know...to time everything so that everything finishes at the same time.
Place what you are cooking on to the side that you would like to mark first. We call this the “presentation side” it is the side we chefs choose to present to our hungry diners.
If you can imagine the face of a clock. You want to place(the chicken breast in my case) at an angle from the 2 o’clock position to 8 o’clock. Let sit, I know the temptation to lift it up and check is strong but you must resist! If you are impatient and lift the chicken too early it may have a tendency to stick.
If you are judging that you will be cooking a chicken breast on each side for 8mins depending on thickness. I would decide to turn the chicken at the 4 minute mark.
Once time is up change its position on the grill. Imagine that clock face again and turn the chicken to a 10 o’clock direction to 4 o’clock orientation on the grill.
Wait the remaining allotted time on the first side and then flip it over. I usually mark one side and flip and cook whatever it is that I am cooking on the other side to the desired doneness.
Once you flip it over you will see perfect grill marks and it will always garner you compliments and will make for a great photo for your blog!
Keep posted for other simple and quick tips soon! Get out and get cooking!
Monday, 2 May 2011
Salads Part Two
How to dress the perfect salad?
When I began my apprenticeship at a boutique hotel in Toronto, I started my kitchen career at the ‘garde manger’ position. That meant it was my responsibility to take care of preparing the cold appetizers, desserts, hors d’oeuvres and salads. It was hard work, but I learned a lot very quickly.
One of the most useful and valuable skills that I learned was how to dress a salad. I can’t think of a worse first impression than a poorly done salad. If a salad is over or under-dressed, it gives me a bad first impression and it makes it difficult for me to enjoy the rest of a meal. A salad, as with any other appetizer, is supposed to awaken my taste buds and wet the appetite for what hopefully is a great meal to come. However, many times the salad is not well executed…and there is really no excuse. Just follow these simple steps to salad glory!
Here are some tips to follow:
1. Wash your greens in cold running water and then toss into a salad spinner (or use paper towels to dry)
2. Rip the leaves! Do not cut with a knife; this ultimately leads to dark edges and bruising of delicate greens
3. Prep your other ingredients – be as creative as you want i.e. tomatoes, spring onions, fresh basil leaves, etc…
4. Prep your vinaigrette (pictured here is my Horseradish Dijon Vinaigrette – see previous post for recipe)
5. In a cold clean bowl, add ½ of the vinaigrette that you would normally use to dress your salad. Most people tend to add too much dressing. Remember that you can always add more as opposed to take away afterwards.
6. Add your washed greens to the bowl and toss. You can use tongs or your fingers. Be gentle!
7. Taste, adjust and season. Yes, I did say season the salad. The dressing gives flavour but sometimes a pinch of salt and a few cracks of pepper will make a world of difference. Even a squeeze of lemon or lime can spark up the flavour.
8. Add your other ingredients. Taste again and enjoy!
9. Serve immediately! Do not let your dressed salad sit for longer than necessary as the vinaigrette begins to “cook” the greens almost immediately and the result is less than tasty.
Speaking about salad, it’s dinner time for my wife and I so please excuse me! Hope these tips come in handy and be sure to visit again for more tips and techniques!
Labels:
dressings,
hints,
salads,
techniques,
tips
Tuesday, 26 April 2011
Salads Part One
Horseradish Dijon Vinaigrette
Spring has sprung and I am busily tending to our little garden in the city. My thoughts are filled with visions of sprouting fresh greens, arugula and vine ripened tomatoes. Now anyone who knows me knows that I am a total carnivore and live by the BBQ even when the weather gets close to the freezing mark…I’ll save that for another story. With all this meat and BBQ goodness I still need - and yes even crave - a great salad.
Today I am going to share one of my new favourite vinaigrettes. I got my inspiration from Chef Lynn Crawford and her restaurant Ruby Watch Co. It was during a recent birthday celebration that I was served a very lovely, yet simple, salad with panko crusted goat cheese fritters. The fritters were excellent, but it was the vinaigrette that stole the show for me. Chef Lynn created a very simple vinaigrette that had horseradish as an ingredient, which I thought was exquisite. Below is my own rendition of this very tasty dressing.
What you will need:
1 cup (250mL) - Olive oil or a good light flavoured salad oil (i.e. sunflower seed)
⅓ cup (75mL) - White wine vinegar or Apple cider vinegar
1 tbsp (15mL) - Freshly grated horseradish or prepared (hot or mild your choice)
1 tbsp (15mL) - Dijon mustard
1 tsp (15mL) - Honey
1 tsp (5mL) - Worchester sauce
1 clove - Garlic (grated or minced very fine)
2–3 sprigs - Fresh thyme
½ - Lemon, juice (use the zest if you like more bite)
To taste - Sea salt and cracked black pepper
Directions:
1. Combine horseradish, honey, garlic, Dijon, Worchester and lemon juice (zest) into a bowl and gently mix with a wire whisk.
2. Add vinegar keeping in mind that for the desired amount of dressing, the ratio should be 1 part vinegar and flavouring ingredients to 3 parts oil.
3. Once evenly combined, slowly add oil to the bowl. Whisk oil gently and then more vigorously once all the ingredients have been added.
4. Once dressing is thoroughly mixed – taste and adjust to your liking.
5. Add thyme (stems removed) and then mix, taste and adjust again.
6. Enjoy with your favourite salad greens or anything else you can use a vinaigrette for – i.e. a marinade for chicken. The vinaigrette will last a couple of days refrigerated. (Note: If using olive oil, give the dressing a good shake when you take it out of the refrigerator as olive oil tends to clump when cold).
I hope that you will enjoy my twist on a traditional vinaigrette. Wishing you a great summer and happy salads! Until next time…
Labels:
dressings,
hints,
salads,
techniques,
tips
Subscribe to:
Posts (Atom)